The following eight point process should enable you to make good splices
every time with the least loss of time. Read through the following points and be
sure that you understand them thouroughly before starting your work.
- Remove the brush from the cement bottle with your right hand, wipe of any
excess on the edge of the bottle and apply the cement to the scraped area with
one quick stroke.
- Return the brush-cap to the bottle and give the cap a half turn to keep it
tight enough to avoid spilling the cement as you move the splicer blades.
- With your right hand, bring the right upper blade down with enough force
to cut off the extra half-frames on both sides. (The bottom edge of the right
blade will cut off the left side. The top edge of the left upper blade will
cut off the right side.) As the right blade comes down, it hits the stop pin
on the splicer base which causes it to stop exactly even with the left blade.
NOTE: Although some force is needed to cut the film during the final process,
it is not necessary to slam the blades down. Too much force can cause an
alignment problem and damage the splicer.
- Open the left blades with your left hand to let air in to speed drying
while...
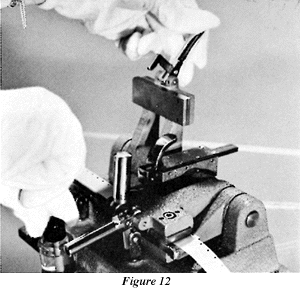
- Your right hand completes the process of securing the cap to the cement
bottle (Fig. 12).
- With the cap secured, open the vertical lock on the right blade.
- Check the edge of the film nearest the closed right blade. If any cement
has leaked through, remove it carefully with a lint free cloth. Be sure not to
spread the cement as you clean. It is still wet and can smear and damage the
film if you are not careful. If this happens, remember, next time, don't use
quite so much cement. Too much cement not only causes sloppy splices but it
also fills up sprocket holes and causes the film to jump on printers and
projectors.
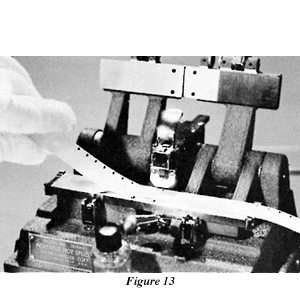
- By the time you finish step 7 above, the splice should be dry and ready to
remove from the splicer. When removing a spliced section, always lift up from
the LEFT side (Fig. 13). This places the strain with the overlap rather
than against it. This is particularly important in case you misjudge your
drying time and attempt to remove a splice that is not quite dry. Pulling up
WITH the overlap protects the splice from unnecessary stress during the final
drying stage.


 Film Collector's
Reference Center