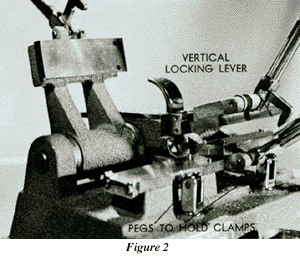
THE DEMONSTRATION SPLICER
The demonstration splicer (Fig. 2) consists of four major sections:
- The two sets of blades - right and left - each with upper and lower
sections. The ends of the blades have sharp cutting edges which trim off the
film ends during during the final welding stage.
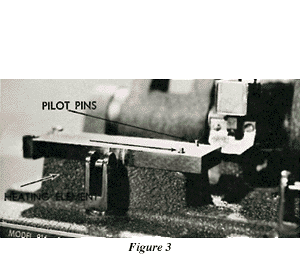
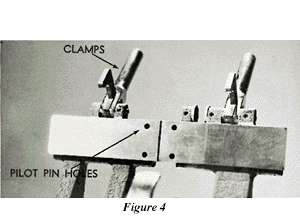
The lower blades have two
sets of pilot pins which fit into corresponding holes in the upper blades to
hold the film in place during splicing (Figures 3 & 4). These two sets of
pins allow splicing with the perforations wither toward or away from the
operator.
Our splicing demonstration will involve the back pins only. The
basics are the same regardless of which pins are used, PROVIDED that either
the front OR the back pins are used since splices can be made in proper
alignment only if both pieces of film are registered on corresponding
pins. (i.e. either both left and right on the back pins or both left or right
on the front pins.)
- The locking clamps - one on each upper blade (Figure 4) and one vertical
locking lever on the lower right blade only (Figure 2).
Locate these parts
on your splicer. Move the blades up and down and lock the clamps to see how
they work. As you move the blades, lower them into closed position and lock
the clamps. The clamps, when properly set, fit into the slotted pegs as either
side of the splicer (Fig. 2) to hold the film in place.
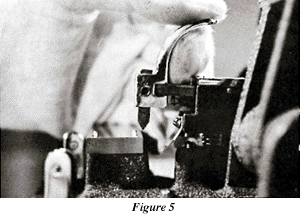
- The scraper which is used to remove the emulsion, an essential step in
welding the two ends of film together (Fig. 5). The scraper is held taut by a
spring and is designed to be used in a front to back motion only. Using the
scraper in reverse motion can ruin its cutting edge and will increase the
possibility of tearing the film during scraping.
- The heating element, under the immovable left lower blade. Its function is
to speed cement drying (Fig. 3)
- Traditionally, the material used to make the ends of the film adhere
together has been called cement. It is never called glue or paste. Both of
these words are used in the trade to describe poor or amateurish
editing.
The cement must always be kept fresh. Fresh cement is always quite
thin, never thick or gooey. If you have doubts about the freshness of your
cement, dump it out and refill the bottle.
CAUTION: Always clean and refill
cement bottles away from the film handling area. If cement is spilled on film,
furniture or clothing, it can cause serious damage.
 Film Collector's
Reference Center
Film Collector's
Reference Center